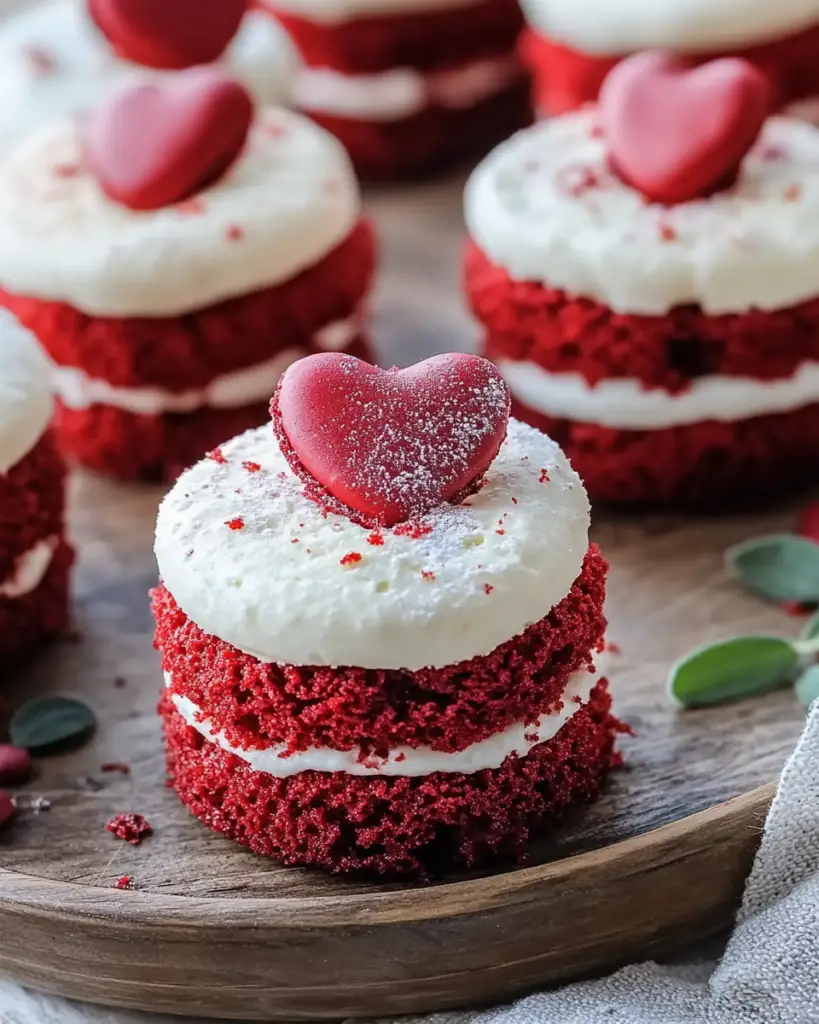
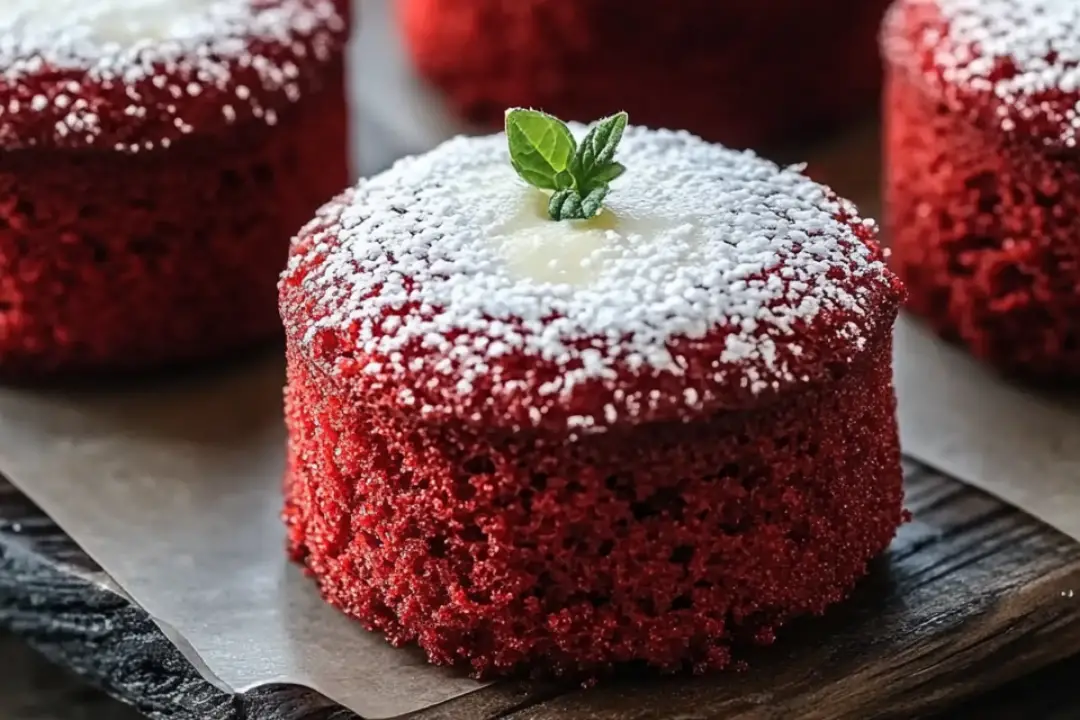
If you’re looking for the perfect sweet treat to celebrate Valentine’s Day, these mini red velvet cakes are it! They’re soft, fluffy, and topped with a creamy, dreamy cream cheese frosting that’s pure perfection. The deep red color and rich flavor make these cakes a showstopper, and their mini size makes them the perfect individual dessert for sharing. You’ll love how these little cakes bring a big dose of joy and sweetness to any occasion!
Why You’ll Love Valentine’s Day Mini Red Velvet Cakes
These mini cakes are a fun and festive way to make Valentine’s Day even sweeter. Here’s why they’re the perfect treat:
Adorable and Perfectly Sized
Their mini size makes them perfect for individual servings, and they’re so cute! It’s hard to resist the charm of these tiny red velvet cakes.
Light and Fluffy
Red velvet cakes are known for being soft and light, with a subtle cocoa flavor that pairs wonderfully with the cream cheese frosting.
Perfect for Any Occasion
Whether you’re baking for your Valentine, a get-together with friends, or just to enjoy with family, these mini cakes are always a hit.
Easy to Make
This recipe is straightforward, and even beginner bakers will have no problem making these adorable cakes from scratch.

Disclosure: This post contains affiliate links.If you click and make a purchase, I may earn a small commission at no extra cost to you.
Ingredients
For the Cake:
- All-purpose flour: The base for the cake, giving it structure while keeping it light.
- Granulated sugar: Adds sweetness and helps with the cake’s moisture.
- Cocoa powder: Just a little bit to give the cake a hint of chocolate flavor.
- Baking soda: Helps the cakes rise and become light and fluffy.
- Salt: A pinch to balance the sweetness and enhance the flavors.
- Buttermilk: Adds moisture and gives the cakes that classic soft, tender texture.
- Vegetable oil: Keeps the cakes moist and gives them a smooth texture.
- Eggs: Bind everything together and add richness to the cakes.
- Red food coloring: Gives the cakes their signature deep red color.
- Vanilla extract: Adds a lovely, aromatic sweetness to the cake.
For the Cream Cheese Frosting:
- Cream cheese: The base of the frosting—rich and tangy, it pairs perfectly with the sweetness of the cake.
- Unsalted butter: Adds richness and smoothness to the frosting.
- Powdered sugar: Makes the frosting sweet and fluffy.
- Vanilla extract: A touch of vanilla to round out the flavor.
- Salt: Just a pinch to balance the sweetness of the frosting.
Instructions
Step 1: Preheat the Oven and Prepare the Pan
Preheat your oven to 350°F (175°C). Grease and flour a muffin tin or line it with paper cupcake liners. This recipe should make 12 mini cakes.
Step 2: Make the Cake Batter
In a large bowl, whisk together the flour, granulated sugar, cocoa powder, baking soda, and salt. In another bowl, whisk together the buttermilk, vegetable oil, eggs, red food coloring, and vanilla extract. Slowly add the wet ingredients to the dry ingredients and mix until just combined. Be careful not to overmix the batter.
Step 3: Fill the Cups
Divide the batter evenly among the cupcake cups, filling each one about 2/3 full. The cakes will rise as they bake, so don’t overfill the cups.
Step 4: Bake the Cakes
Bake for 18-20 minutes, or until a toothpick inserted into the center of the cakes comes out clean. Let the cakes cool in the pan for 5 minutes before transferring them to a wire rack to cool completely.
Step 5: Make the Cream Cheese Frosting
While the cakes are cooling, make the frosting. Beat the cream cheese and butter together in a large bowl until smooth. Gradually add the powdered sugar, vanilla extract, and a pinch of salt, continuing to beat until the frosting is smooth and fluffy.
Step 6: Frost the Cakes
Once the cakes are completely cool, frost each one with a generous amount of cream cheese frosting. You can use a piping bag for a decorative swirl or simply spread it with a spatula. Garnish with sprinkles or a small heart-shaped decoration for that extra Valentine’s Day touch.
Step 7: Serve and Enjoy
These mini red velvet cakes are ready to be enjoyed! Serve them to your loved ones and enjoy every last bite.
Nutrition Facts
Servings: 12
Calories per serving: 320
Preparation Time
Prep Time: 20 minutes
Cook Time: 20 minutes
Total Time: 40 minutes
How to Serve Valentine’s Day Mini Red Velvet Cakes
For a Sweet Treat
Serve these mini cakes on their own, or alongside a cup of coffee or hot cocoa for a cozy Valentine’s treat.
Perfect for Parties
These mini cakes are great for any Valentine’s Day celebration. They’re easy to serve and add a festive touch to any dessert table.
As a Gift
Wrap them individually in cute boxes or gift bags for a sweet homemade gift your loved ones will adore.
Additional Tips
Make Ahead
You can bake the cakes and store them in an airtight container for up to 2 days. Frost just before serving.
Frosting Variations
If you’re not a fan of cream cheese frosting, you can substitute with whipped cream frosting or a simple buttercream.
Food Coloring
If you prefer a more natural approach, you can try beet juice or other natural food colorings to achieve the red hue.
Decorate Your Cakes
Top the frosted cakes with edible glitter, sprinkles, or even a few small chocolate hearts to make them extra special.
FAQ Section
Q1: Can I make these cakes ahead of time?
A1: Yes, you can bake the cakes ahead of time. Store them in an airtight container at room temperature for up to 2 days, and frost them just before serving.
Q2: Can I use a different frosting?
A2: Absolutely! If cream cheese frosting isn’t your thing, you can use whipped cream frosting, buttercream, or even ganache.
Q3: Can I use a different size pan for this recipe?
A3: Yes, you can use a regular 9-inch round cake pan, but you’ll need to adjust the baking time. Start checking for doneness at 25 minutes.
Q4: How do I store leftovers?
A4: Store leftover mini cakes in an airtight container at room temperature for up to 2 days, or refrigerate them for up to 5 days.
Q5: Can I freeze these cakes?
A5: Yes, you can freeze the un-frosted cakes for up to 3 months. Thaw them at room temperature and frost them once they’re fully thawed.
Q6: Can I add mix-ins to the cake batter?
A6: Absolutely! Feel free to add chocolate chips, nuts, or even a swirl of raspberry jam to the batter for extra flavor.
Q7: How can I make the frosting dairy-free?
A7: To make the frosting dairy-free, you can use dairy-free cream cheese and butter substitutes, and powdered sugar.
Q8: How can I make the red velvet cakes less sweet?
A8: You can reduce the amount of sugar in the cake batter slightly if you prefer less sweetness. Keep in mind the frosting will still add sweetness.
Q9: What’s the best way to frost the cakes?
A9: For a pretty look, use a piping bag fitted with a star tip to swirl the frosting on top. Or, just spread it with a spatula for a more rustic finish.
Q10: Can I use regular food coloring instead of gel?
A10: Yes, but gel food coloring gives a more vibrant red color with less liquid. Regular liquid food coloring might result in a less intense color.
Conclusion
These Valentine’s Day Mini Red Velvet Cakes are the ultimate way to say “I love you” with a sweet and adorable treat. Soft, rich, and topped with creamy frosting, they’ll make anyone’s heart skip a beat! Whether you’re baking for your partner, friends, or family, these mini cakes are sure to bring smiles and a whole lot of love to the table. Enjoy every delicious bite!
Print
Valentine’s Day Mini Red Velvet Cakes Recipe
- Total Time: 0 hours
- Yield: 6 servings
Description
These Valentine’s Day Mini Red Velvet Cakes are rich, moist, and adorned with a luscious cream cheese frosting. Perfect for sharing with your loved ones, these individual cakes are the ideal dessert for a Valentine’s Day celebration.
Ingredients
For the Cakes:
- 1 1/2 cups all-purpose flour
- 1 cup granulated sugar
- 1 tsp baking soda
- 1/2 tsp salt
- 1 tbsp cocoa powder
- 1 cup buttermilk, room temperature
- 1/2 cup vegetable oil
- 2 large eggs, room temperature
- 2 tbsp red food coloring (or as needed)
- 1 tsp vanilla extract
- 1 tsp white vinegar
For the Cream Cheese Frosting:
- 8 oz cream cheese, softened
- 1/2 cup unsalted butter, softened
- 4 cups powdered sugar
- 1 tsp vanilla extract
- Pinch of salt
For Decoration:
- Red sprinkles or heart-shaped decorations (optional)
Instructions
-
For the Cakes:
- Preheat the Oven:
- Preheat the oven to 350°F (175°C). Grease and flour 6 small ramekins or mini cake pans (or use a standard muffin tin if you don’t have mini cake pans).
- Mix the Dry Ingredients:
- In a medium bowl, whisk together the flour, sugar, baking soda, salt, and cocoa powder. Set aside.
- Combine Wet Ingredients:
- In a separate large bowl, whisk together the buttermilk, oil, eggs, food coloring, vanilla extract, and vinegar. Make sure the food coloring is evenly incorporated into the wet mixture.
- Combine Wet and Dry Ingredients:
- Gradually add the dry ingredients to the wet ingredients, stirring until the batter is smooth and well-combined.
- Bake the Cakes:
- Divide the batter evenly among the mini cake pans or ramekins. Bake for 20-25 minutes, or until a toothpick inserted into the center comes out clean. (If using a muffin tin, check at around 18 minutes.)
- Allow the cakes to cool in the pans for 10 minutes before transferring them to a wire rack to cool completely.
For the Cream Cheese Frosting:
- Make the Frosting:
- In a large mixing bowl, beat together the softened cream cheese and butter until smooth and creamy.
- Gradually add the powdered sugar, 1 cup at a time, beating until the frosting is light and fluffy. Add the vanilla extract and pinch of salt, and beat for an additional minute until smooth and creamy.
Assembling the Cakes:
- Frost the Cakes:
- Once the mini cakes have completely cooled, spread a generous layer of cream cheese frosting on top of each mini cake. You can use a spatula to smooth the frosting or pipe it onto the cakes for a more decorative look.
- Decorate:
- Top each mini cake with red sprinkles or heart-shaped decorations for a festive touch.
- Serve:
- Serve the mini red velvet cakes immediately, or refrigerate them for up to 2 days. They taste great when chilled!
- Preheat the Oven:
Notes
- If you prefer, you can make this recipe as a single-layer cake by using an 8-inch round cake pan instead of mini pans.
- You can add a few tablespoons of milk to the frosting if you want a softer consistency.
- You can freeze any leftover cakes for up to 1 month. Just make sure to wrap them tightly in plastic wrap and foil.
- Prep Time: 20 minutes
- Cook Time: 20-25 minutes
- Category: Dessert
- Method: Baking
- Cuisine: American
Nutrition
- Serving Size: 1 mini cake
- Calories: 350
- Sugar: 32g
- Sodium: 150mg
- Fat: 22g
- Saturated Fat: 9g
- Unsaturated Fat: 11g
- Trans Fat: 0g
- Carbohydrates: 35g
- Fiber: 1g
- Protein: 3g
- Cholesterol: 55mg


