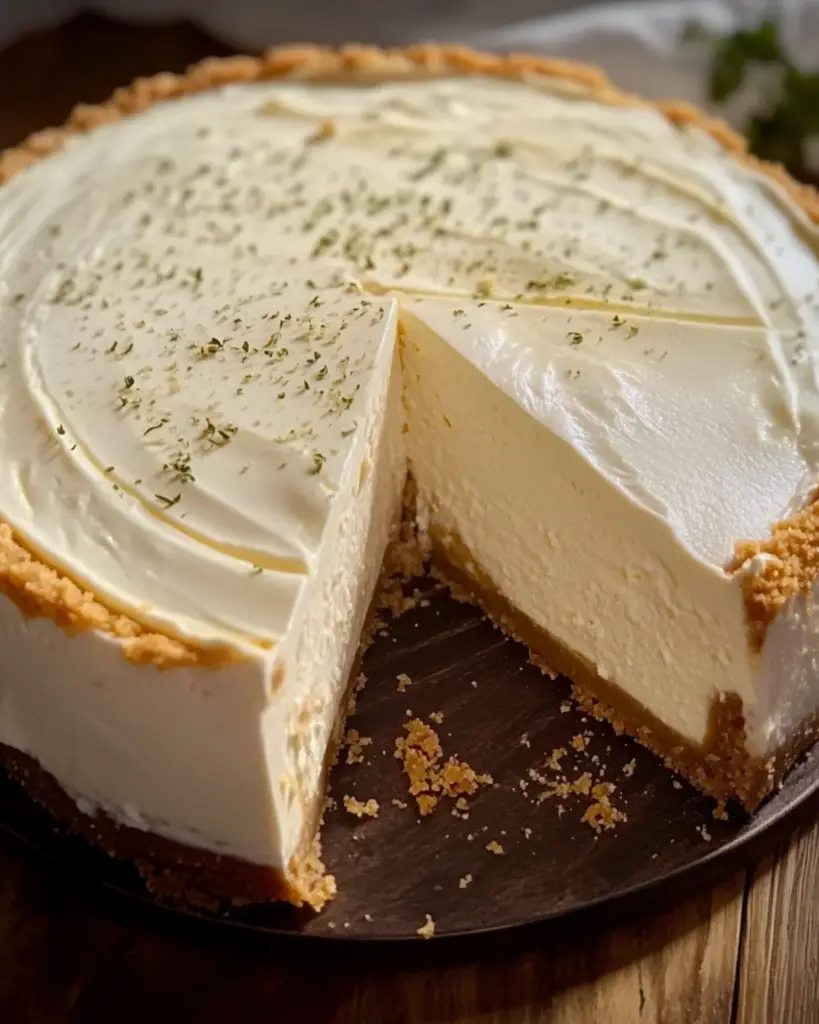
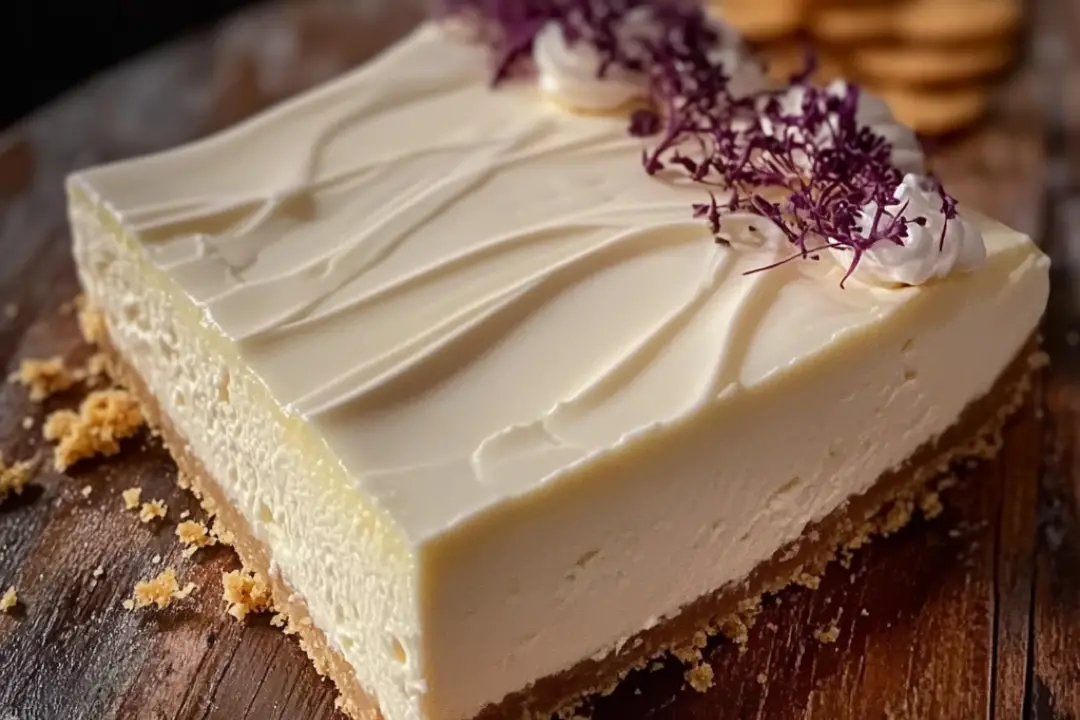
If you’ve been dreaming of the perfect cheesecake, one that’s creamy, decadent, and bursting with vanilla flavor, then look no further. This Vanilla Bean Cheesecake with a Vanilla Wafer Crust is the kind of dessert that makes you weak in the knees. It’s rich and velvety, with a buttery, crunchy crust that perfectly complements the smooth filling. And that vanilla bean? It takes the flavor to a whole new level—luxurious, fragrant, and utterly irresistible. Trust me, once you take your first bite, you’ll know you’ve found something truly special.
Why You’ll Love Vanilla Bean Cheesecake with a Vanilla Wafer Crust
Let me tell you why this cheesecake is going to be your new go-to:
Decadent Yet Simple: It’s a cheesecake that looks and tastes fancy, but the steps are straightforward. There’s no need for a complicated water bath or fancy techniques—just a deliciously creamy dessert that’s totally achievable.
Gorgeous Flavor: The addition of real vanilla bean in the filling gives this cheesecake an incredibly fragrant, pure vanilla flavor. No imitation vanilla here—this is the real deal.
Perfect Texture: It’s got the perfect balance of dense, creamy richness with a lightness that makes it feel airy and indulgent at the same time. That’s the magic of cheesecake!
A Showstopper: Whether you’re hosting a dinner party, celebrating a birthday, or just want to treat yourself, this cheesecake is sure to steal the show. Its elegant look and amazing flavor make it perfect for any occasion.

Disclosure: This post contains affiliate links.If you click and make a purchase, I may earn a small commission at no extra cost to you.
Ingredients
Here’s what you’ll need to bring this beautiful dessert to life:
Vanilla Wafers: These crunchy, sweet cookies create the perfect crust for the cheesecake. They’re buttery and slightly sweet, making the ideal base for the creamy filling.
Butter: Just a little melted butter to bind the crust together and give it that irresistible richness.
Cream Cheese: The base of any good cheesecake, cream cheese brings the perfect smooth, tangy texture.
Sugar: You’ll need regular granulated sugar to sweeten the cheesecake filling.
Eggs: Eggs help set the cheesecake, giving it that lovely, dense texture that’s both creamy and firm.
Vanilla Bean: This is what makes this cheesecake extra special. The vanilla bean seeds are scraped into the filling, giving the dessert an elegant, fragrant vanilla flavor that you just can’t get from vanilla extract.
Sour Cream: Adds a touch of tang to balance out the richness of the cream cheese, keeping the flavor fresh.
Flour: Just a little flour to help stabilize the cheesecake and keep it from being too soft.
(Note: Full ingredient measurements are provided in the recipe card below.)
Instructions
Let’s dive into how to make this vanilla bean cheesecake:
Make the Crust:
Start by preheating your oven to 325°F (163°C). Then, in a food processor or using a ziplock bag and a rolling pin, crush the vanilla wafers into fine crumbs. Pour the crumbs into a mixing bowl, then add the melted butter and stir until everything is combined.
Press the Crust:
Transfer the crumb mixture into the bottom of a 9-inch springform pan. Press the crumbs down with the back of a spoon or your fingers to create an even layer. Bake the crust for 10 minutes, then remove it from the oven and set it aside to cool slightly.
Prepare the Filling:
In a large mixing bowl, beat the cream cheese until it’s smooth and creamy. You can use a hand mixer or stand mixer for this. Add the sugar and beat until combined, then add the eggs, one at a time, mixing well after each addition.
Add the Vanilla Bean:
Cut the vanilla bean in half lengthwise, then scrape the seeds out with a knife. Add the vanilla bean seeds into the cream cheese mixture along with the flour and sour cream. Beat everything together until smooth and well combined.
Pour the Filling:
Once your filling is smooth and creamy, pour it over the slightly cooled crust in the springform pan. Use a spatula to spread the filling evenly and smooth the top.
Bake the Cheesecake:
Bake the cheesecake at 325°F (163°C) for 50-60 minutes. The edges should be set, but the center will still have a slight jiggle. Don’t worry, that’s perfect! The cheesecake will continue to set as it cools.
Cool and Chill:
Once the cheesecake is done baking, turn off the oven and let the cheesecake cool in the oven with the door slightly ajar for about an hour. Then, remove it from the oven and refrigerate for at least 4 hours (or overnight if you can wait!) to let it firm up and develop the best flavor.
Serve:
Once the cheesecake is chilled and set, remove it from the springform pan and transfer it to a serving platter. You can top it with fresh berries, whipped cream, or even a drizzle of caramel or chocolate if you’re feeling extra indulgent.
Nutrition Facts
Servings: 12
Calories per serving: 350-400 (depending on portion size)
Preparation Time
Prep Time: 15 minutes
Cook Time: 1 hour
Chill Time: 4 hours
Total Time: 5 hours 15 minutes
How to Serve Vanilla Bean Cheesecake with a Vanilla Wafer Crust
This cheesecake is absolutely stunning on its own, but if you want to elevate it even more, here are a few delicious ideas:
Fresh Berries: A topping of fresh strawberries, raspberries, or blueberries is a light, refreshing contrast to the rich, creamy cheesecake.
Whipped Cream: A dollop of freshly whipped cream adds a light, airy texture that’s perfect with the cheesecake’s richness.
Caramel or Chocolate Sauce: Drizzle a little homemade caramel or chocolate sauce on top for an extra indulgent touch.
Crushed Vanilla Wafers: For a little extra crunch and flavor, you can top the cheesecake with crushed vanilla wafers or graham crackers.
Additional Tips
Here are some pro tips to make sure your cheesecake turns out perfectly:
Room Temperature Ingredients: Make sure your cream cheese and eggs are at room temperature before you begin. This will ensure the filling is smooth and doesn’t have any lumps.
Don’t Overmix: When making the filling, avoid overmixing. Just mix until everything is smooth and well combined. Overmixing can cause the cheesecake to crack as it bakes.
Chill Overnight: If you have the time, let your cheesecake chill overnight. The flavors develop more, and the texture becomes even better.
Cracking Cheesecake: If your cheesecake cracks, don’t stress! You can always cover it up with whipped cream, berries, or a drizzle of sauce.
Springform Pan: A springform pan is essential for easy removal, so don’t skip this. If you don’t have one, line your pan with parchment paper for easy lifting.
FAQ Section
Q1: Can I use a different crust?
A1: Absolutely! You can use a graham cracker crust or even a chocolate cookie crust if you want to switch things up.
Q2: Can I make this cheesecake ahead of time?
A2: Yes, this cheesecake is perfect for making ahead of time. Let it chill in the fridge for at least 4 hours, or even better, overnight.
Q3: Can I freeze this cheesecake?
A3: Yes! You can freeze the cheesecake (without toppings) for up to 3 months. Just make sure it’s wrapped tightly in plastic wrap and foil. Let it thaw in the fridge before serving.
Q4: Can I use vanilla extract instead of vanilla beans?
A4: While vanilla extract will still give you great flavor, using vanilla beans is what makes this cheesecake special. If you must use extract, 1 tablespoon will work in place of the vanilla bean.
Q5: How do I prevent my cheesecake from cracking?
A5: To prevent cracking, avoid overbaking and let the cheesecake cool gradually in the oven with the door cracked open. Also, ensure your ingredients are at room temperature before mixing.
Q6: How do I know when the cheesecake is done?
A6: The edges should be set, and the center should have a slight jiggle. It will firm up as it cools.
Q7: Can I make this cheesecake gluten-free?
A7: Yes! You can easily make the crust gluten-free by using gluten-free vanilla wafer cookies.
Q8: Can I make this without sour cream?
A8: Yes! You can substitute the sour cream with Greek yogurt for a similar tangy flavor.
Q9: How do I serve leftover cheesecake?
A9: Store leftovers in an airtight container in the fridge for up to 3 days. Serve chilled or at room temperature for the best texture.
Q10: Can I add a topping to the cheesecake?
A10: Absolutely! Fresh fruit, whipped cream, or a drizzle of caramel or chocolate sauce would all be delicious additions.
Conclusion
This Vanilla Bean Cheesecake with a Vanilla Wafer Crust is truly the stuff dessert dreams are made of. It’s simple, elegant, and bursting with vanilla goodness that will leave you and your guests craving more. Whether you’re making it for a special occasion or just because, this cheesecake is bound to impress. So get ready to bake, chill, and enjoy the ultimate indulgence. Happy baking!
Print
Vanilla Bean Cheesecake with a Vanilla Wafer Crust
- Total Time: 0 hours
- Yield: 12 servings 1x
- Diet: Vegetarian
Description
This rich and creamy vanilla bean cheesecake, set on a buttery vanilla wafer crust, is a perfect dessert for any occasion. The blend of real vanilla beans and cream cheese creates a melt-in-your-mouth experience. A classic treat that’s sure to impress!
Ingredients
For the Vanilla Wafer Crust:
- 1 1/2 cups vanilla wafer crumbs (about 45–50 vanilla wafer cookies)
- 1/4 cup sugar
- 1/2 teaspoon cinnamon (optional)
- 1/3 cup unsalted butter, melted
For the Vanilla Bean Cheesecake Filling:
- 3 (8 oz) packages cream cheese, softened
- 1 cup granulated sugar
- 1 tablespoon vanilla bean paste or 2 vanilla beans, scraped
- 3 large eggs
- 1/2 cup sour cream
- 1/4 cup heavy cream
- 1 teaspoon vanilla extract
- Pinch of salt
For the Topping (Optional):
- Fresh berries (such as strawberries or raspberries)
- Whipped cream
Instructions
- For the Vanilla Wafer Crust:
- Preheat your oven to 325°F (163°C).
- In a medium-sized bowl, combine the vanilla wafer crumbs, sugar, and cinnamon (if using). Add the melted butter and stir until the mixture is evenly moistened.
- Press the mixture into the bottom of a 9-inch springform pan, creating an even layer across the bottom.
- Bake the crust for 10 minutes, then remove from the oven and let it cool while you prepare the cheesecake filling.
For the Vanilla Bean Cheesecake Filling:
- In a large mixing bowl, beat the softened cream cheese and sugar together using a hand mixer or stand mixer on medium speed until smooth and creamy (about 3 minutes).
- Add the vanilla bean paste (or scraped vanilla beans) and vanilla extract, mixing until incorporated.
- Add the eggs, one at a time, beating well after each addition. Scrape down the sides of the bowl as needed.
- Stir in the sour cream, heavy cream, and a pinch of salt, mixing until smooth.
- Pour the cheesecake filling into the cooled crust, spreading it evenly with a spatula.
- Bake the cheesecake at 325°F (163°C) for 50-60 minutes, or until the center is set (it should be slightly jiggly but not liquid).
- Turn off the oven, crack the oven door, and let the cheesecake cool inside for 1 hour. Afterward, remove the cheesecake from the oven and let it cool completely at room temperature.
- Once cooled, refrigerate the cheesecake for at least 4 hours, preferably overnight.
For the Topping (Optional):
- Once the cheesecake has chilled, top with fresh berries and whipped cream before serving, if desired.
Notes
- For a smoother texture, make sure the cream cheese is fully softened before mixing.
- You can use graham cracker crumbs instead of vanilla wafers if preferred.
- Be careful not to overbake the cheesecake; it’s done when the edges are set and the center is still slightly jiggly.
- Prep Time: 20 minutes
- Cook Time: 50-60 minutes
- Category: Dessert
- Method: Baking
- Cuisine: American
Nutrition
- Serving Size: 1 slice
- Calories: 350 kcal
- Sugar: 26g
- Sodium: 220mg
- Fat: 26g
- Saturated Fat: 16g
- Unsaturated Fat: 8g
- Trans Fat: 0g
- Carbohydrates: 28g
- Fiber: 0g
- Protein: 4g
- Cholesterol: 90mg


